Living in Southern California we tend to have sunny weather a good part of the year. It's the last day of November and my roses in my backyard are still blooming. The fragrance is unbelievable. I'm not sure how much longer my roses will continue to bloom, but I'll enjoy them as long as I can.
Saturday, November 30, 2013
Friday, November 29, 2013
Black Friday
Once upon a time, I was out shopping the day after Thanksgiving with everybody, hoping to get those great deals. Fast forward many years...I now stay home on Black Friday and shop on the Internet for my Christmas presents. So much easier and less stressful. I just click and point and my order is taken and delivered to my door step a few days later; some Internet stores even offer free wrapping.
So today I spent my day just relaxing and reading a good book and painting. I think I like doing this much better.
Thursday, November 28, 2013
Wednesday, November 27, 2013
Roses WIP
Working on roses using wet-on-wet. Dropping watercolor and then letting each layer dry before dropping in more paint. Tomorrow I'll add more detail and paint.
Tuesday, November 26, 2013
Monday, November 25, 2013
Sunday, November 24, 2013
One sheet journal
Sometimes I see only pictures of journals on the web and then try to figure out how they were made. This is one of those journals.
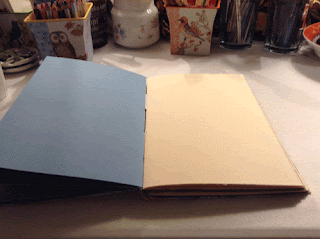
Basically this journal is made with one sheet of watercolor paper folded in half length wise and then folded in half width wise. Then the half is folded one more time, giving 8 sections, each section is 3" x 4.5".
Next the watercolor paper is cut on the center line (not the entire length). Once that is done, the watercolor paper is folded in half length wise with an opening in the middle section of the journal.
Pressing the left and right in creates journal.
With this type of journal, I can sketch or write notes on both sides of the paper.

Saturday, November 23, 2013
Friday, November 22, 2013
Handmade watercolor journal
Today it rained all day which gave me the opportunity to make a new watercolor journal.
I used a pad of Strathmore watercolor paper cold press 140lbs. The pad comes with 12 sheets. The pad board that is in the back of the Strathmore pad, I used as my book covers. I cut the book covers to measures 8.75" L x 6" W.
I did a variation of the long stitch book binding. The middle portion of the journal spine was the final step to complete my journal.
Thursday, November 21, 2013
Luxenbourg Garden Paris
I was going through my photos from my trip to Paris in September and found this little gem. I'm thinking about maybe using this as a reference and paint it in watercolor. Something to think about.
Wednesday, November 20, 2013
Pastel Encyclopedia
I'm really loving Amazon's Prime 2 day shipping. For $79 a year I can get my stuff in 2 days. Now I don't have to try to order their minimum, which use to be $25, but was recently raised to $35 to get free shipping.
So the mail man brought me these today...I ordered Monday and they came today...The Encyclopedia of pastel techniques and a Moleskin with black paper for sketching and painting.
Monday, November 18, 2013
Birds of different colors
Today I worked on birds. Trying to get a handle on birds portions and feet. Daniel Smith watercolors on toned paper.
Sunday, November 17, 2013
Saturday, November 16, 2013
Friday, November 15, 2013
Thursday, November 14, 2013
Clown Inkblot
Clowns. I haven't thought of clowns since I was a kid. I was dropping ink on my watercolor paper today and this is what I saw in the inkblot.
Wednesday, November 13, 2013
Autumn Leaves
Everyday I notice the leaves are changing colors and the leaves are falling to the ground. Soon there won't be any leaves left on the trees.
Tuesday, November 12, 2013
hand made folder
I make a lot of greeting cards and always seem to have lots of left over pieces of card stock. With those left over pieces, I try to find different ways to use them up. Today I wanted to make a folder that was big enough to hold 4" x 5" pieces of watercolor paper to carry in my purse for those moments I might have to do a quick sketch or watercolor painting.
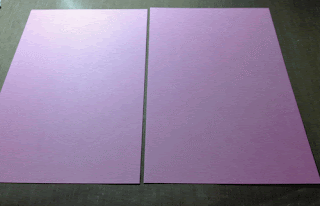
To make this folder I used a piece of pink card stock cut in half, measuring 5.5" x 8.5".
I then folded the 5.5" x 8.5" in half. I used my corner cropper for the top and bottom corners.
Next I took a decorative scrap file folder
I cut into 2 pieces measuring 3" x 5.25
I used my corner cropper and cropped all corners
I then used double sided tape to attach the decorative pieces to the front and back cover.
To keep the sheets of watercolor paper inside--I cut a piece of white card stock 8.5" x 3" then folded in half.
I then used washi tape to attach the white card stock piece inside the folder, bringing the washi tape unto the front of the cover to hold it in place. This is what the folder looks like front and back. I can now put several piece of paper in the folder and I'm ready to go.
Monday, November 11, 2013
Gelli printing
I won't tell you that I've had my 6 x 6 Gelli printing plate since last December and my 8 x 10 Gelli plate for several months. I'd look at them and go on Gelli Art website and watch the videos on how to use them, but they'd just sit in my studio waiting to be used.
So today I finally had the courage to use my 6 x 6 plate. I got out my watercolor paper, brayer, acrylic paint, water bottle, and baby wipes. I squeezed some acrylic paint on the plate and used the brayer to cover the plate. I thought I might of put too much paint on the plate, but I probably used just the right amount. I used a piece of a paper towel to make a flower. I laid the watercolor paper on top of the Gelli plate, smoothed the paper over the plate, and pulled the paper off. I was pleasantly surprised with the impression and how easy it really is to use the Gelli plate. I took another piece of card stock and pulled a ghost image.
Clean up was so easy. I used a baby wipe to pick up any remaining paint. Tomorrow I bring out all my stencils and play.


Sunday, November 10, 2013
Dog Inkblot
Today I found Margaret Peot's Inkblot blog. I also found a couple of her you tube videos showing how she does inkblots.
After viewing the videos I decided I'd try creating an inkblot dog. I folded my paper in half. Dropped ink on the right side of the paper where I thought an eye should be, and nose, and then an outline of the dogs body. Folded the paper, pressed down and then opened the paper to see what marks the ink left. Once the ink dried I went back in and defined the dog with more detail
Saturday, November 09, 2013
Twin birds
With this inkblot painting I actually used watercolors instead of ink. Making these inkblots--you can't just stop at one.
Friday, November 08, 2013
Sheep Inkblot
Inkblots are so cool to try. Just drop a few drops of ink on the page, fold, open and see what image you can find. I usually like to go with the first impression, but will rotate the page to see if I can find any other image. What I saw was a sheep. My husband saw a lobster. So I went with the sheep!
Thursday, November 07, 2013
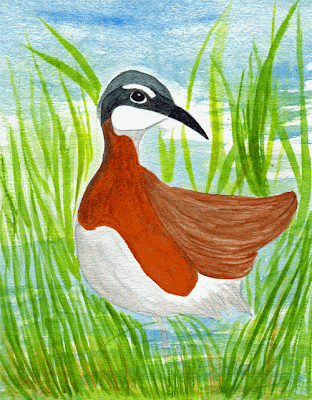
Wilson's Phalarope
Every so often I feel like painting birds. Daniel Smith watercolors 8 x 10 cold press watercolor paper.
Wednesday, November 06, 2013
French bull dogs completed
I'm happy to say this painting is done. It's been a while since I've done a WIP painting. I painted this on toned paper, using Schmincke gouache and Daniel Smith watercolors.
Tuesday, November 05, 2013
French Bull Dog WIP continued
Still working on this painting. Added two more French bull dogs. Just need to finish defining the tan dog and add a back ground.
Monday, November 04, 2013
French bull dog WIP
I started working on this drawing today, but am feeling under the weather, so hopefully I'll finish tomorrow. Gouache and oil pastels on toned paper.
Sunday, November 03, 2013
Owl on toned paper
Today I used my new hand made journal that is filled with toned paper. I drew this owl freehand using Reeves water soluble wax pastels. One thing I tried using was a watercolor scrubby brush to blend the pastels. I thought it worked rather well.
Since this journal will be primarily with pastels and gouache, I thought I would create a color reference on the opposite page.
Saturday, November 02, 2013
Jolie photo of the day
My dog Jolie loves posing for pictures. This dog is treat motivated, so she waits patiently as her portrait is being photographed.
Friday, November 01, 2013
Handmade journal filled with Fabriano Tiziano Paper
Today I made a new journal using Fabriano Tiziano pastel paper that I had bought last weekend at Dick Blick. I had 5 sheets to work with, 2 sheets of blue gray, 2 sheets of cream, and 1 sheet of steel gray. Each sheet measured 20 x 26. Basically I folded the sheets in half length wise and torn apart; then the half sheets I folded in half and torn apart again giving me 4 sheets of pastel paper measuring, measuring 10 x 13. I then folded each sheet in half to form a signature which measured 10 x 6.5.
Next I assembled 5 signatures, each having 4 sheets of paper. I used a simple pamphlet stitch binding for each signature. Once each signature was done, I used binding tape to pull them together. Next I measured a piece of smooth Bristol paper to use as my cover. To attach the cover to the signatures, I used Krylon spray adhesive on the inside of the cover. Then I lined up the signatures to fit inside the cover, gently pressing the first page of the signature to the inside cover. I flipped the journal over and made sure that the back was in place too. I set aside to dry.
I used decorative paper that I had bought last year when I was in Florence, Italy. To attach the decorative paper to the outside journal cover, I used the Krylon spray adhesive. Once the adhesive had dried, I cut out a piece of matching plain card stock paper for the inside cover to hide the decorative paper that was folded over.
Now my new journal is waiting for me to use. Journal size: 10" x 6.5"; 60 pages.
Subscribe to:
Comments (Atom)


